User Benefits
- Comparison and dependency of HITS-T10 system integrated and additional techniques for measuring test forces and stresses, displacements and strains.
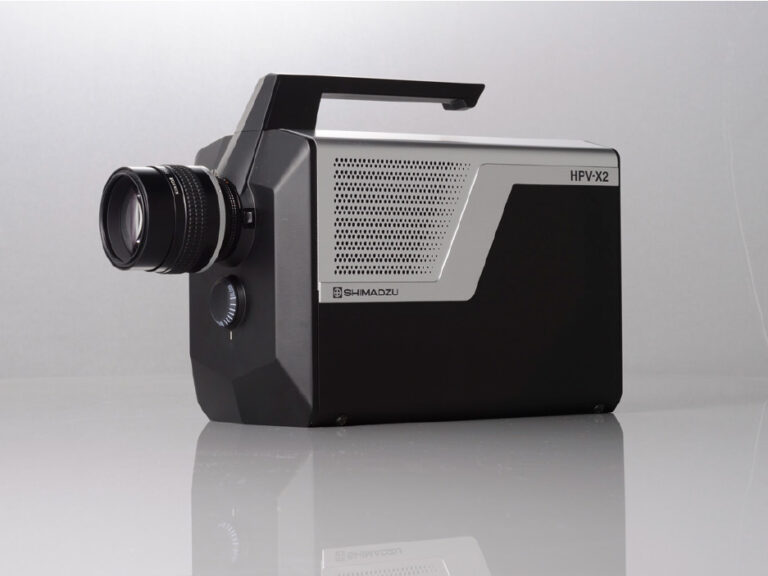
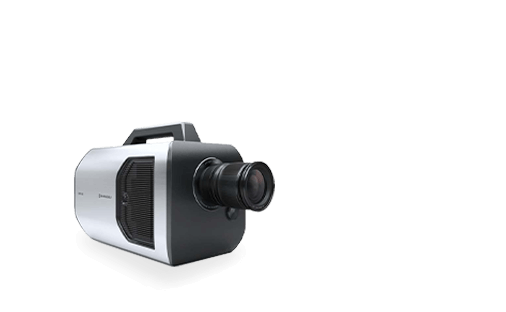
- Innovative measurement with HPV-X2 camera and DIC-analysis, with which true test stresses and strains can be calculated.
Introduction
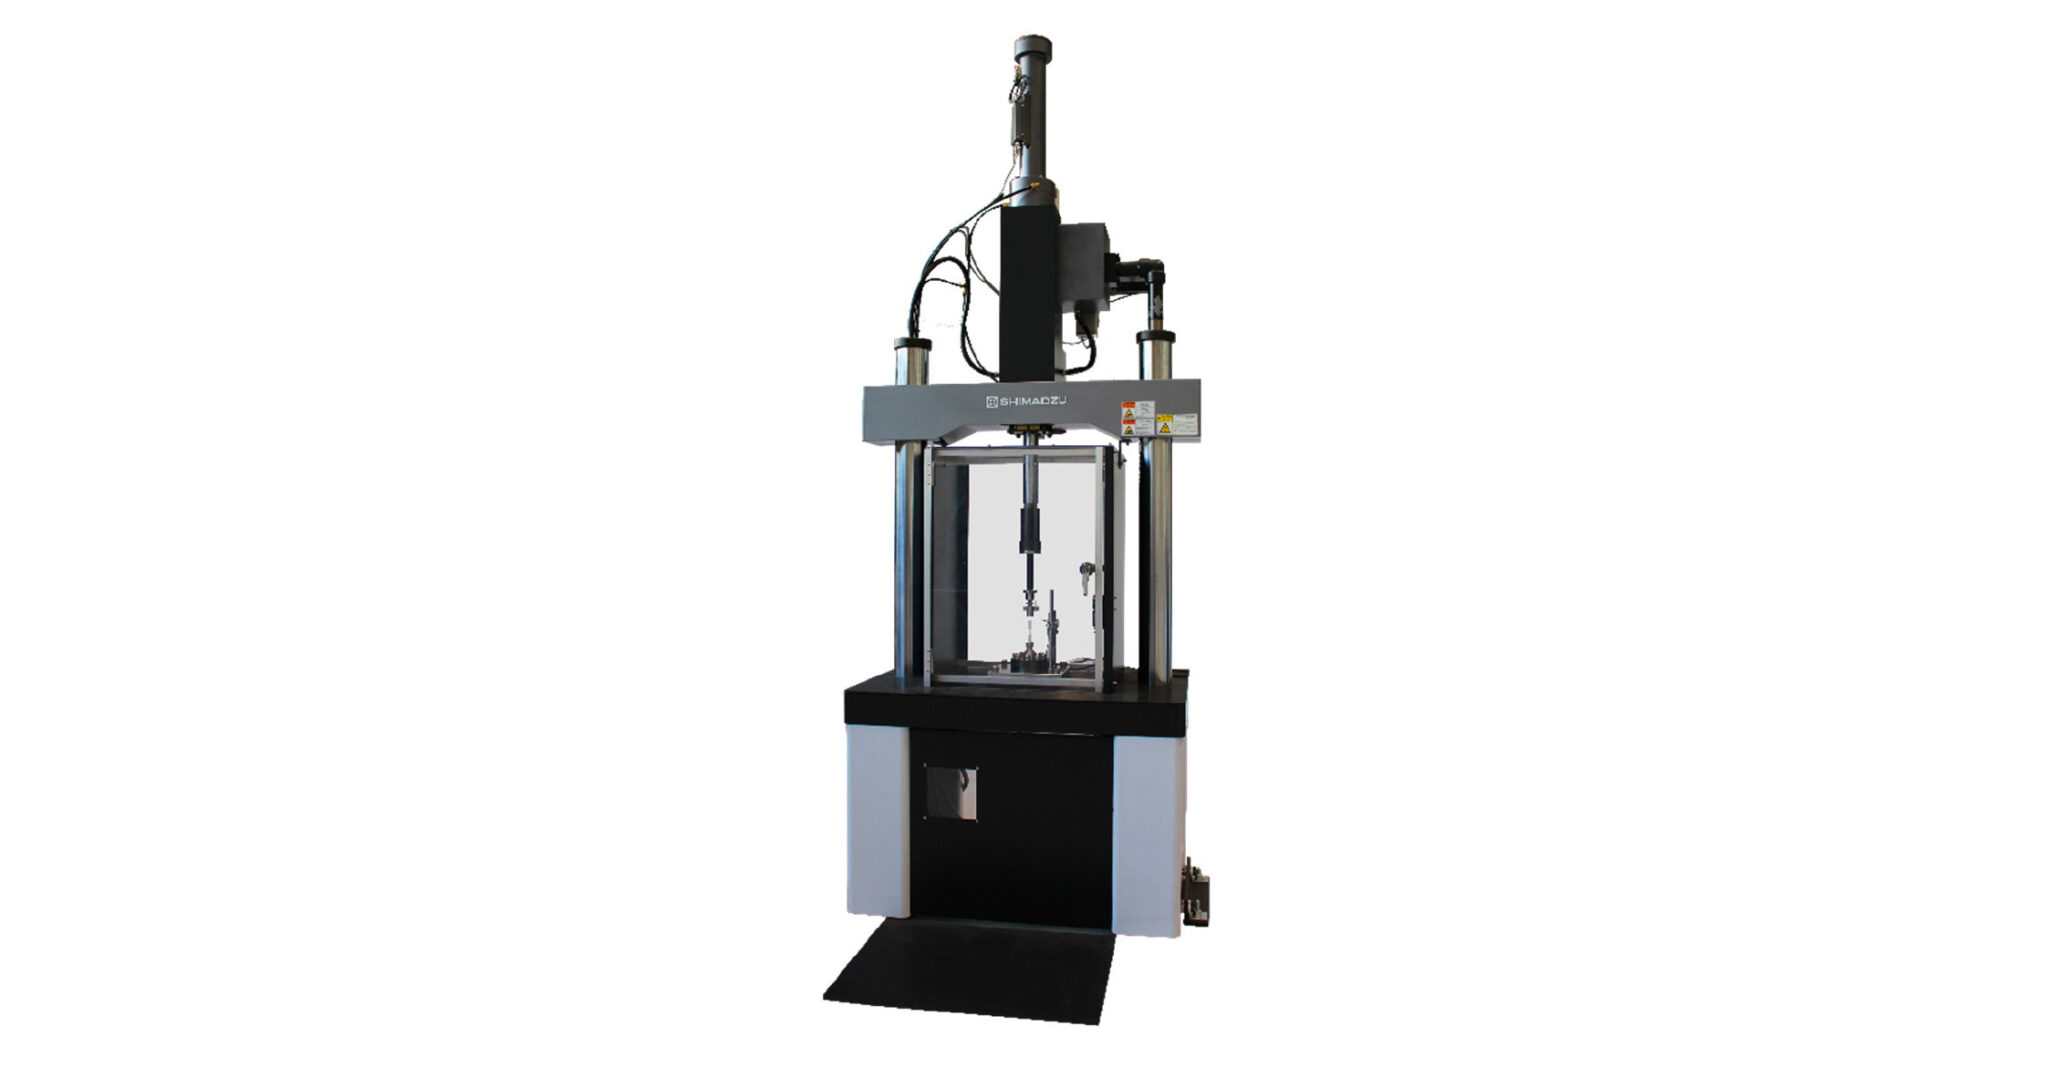
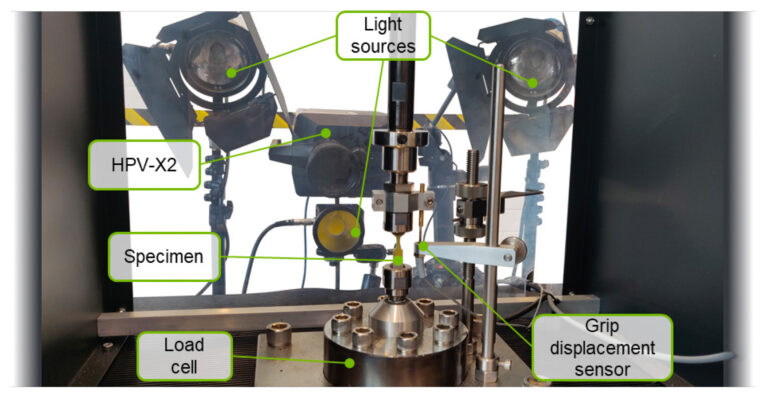
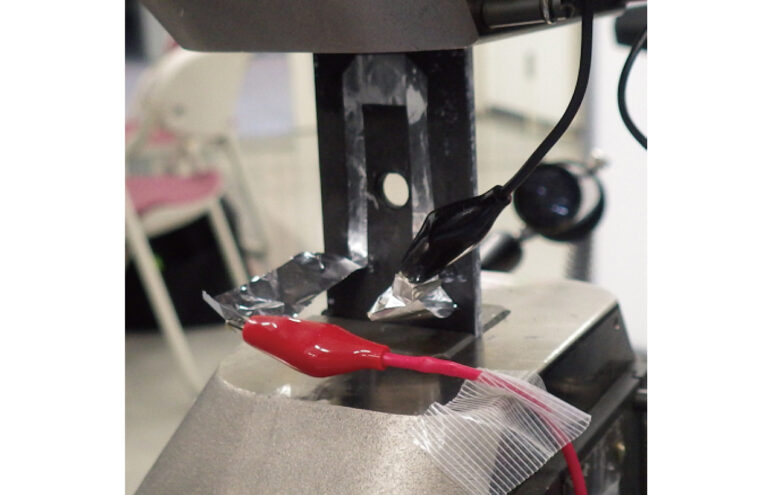
Crash loads with high strain rates can often be found in automotive and aerospace industries, so that a material charac- terization on dynamic basis is required to guar- antee safety properties of highly loaded compo- nents. Most exterior parts nowadays are made of fiber-reinforced polymers (FRP), which show strain rate depend- ent properties [1-3]. For this purpose, the deter- mination of characteris- tic parameters in high- speed tensile tests is a common method. Since FRP show an in creasing ultimate tensile strength (σUTS) with higher strain rates, a high potential regarding material savings and lightweight design is enabled. Consequently, a comprehensive understanding of the data, which is measured in high-speed tensile tests, is necessary. Typically, the test force is provided by a piezo-electric load cell, whereas the piston movement is recorded by a capacitive sensor. This is also how it is realized with the high- speed impact testing machine HITS-TX, Figure 1. Furthermore, HITS-TX provides an additional grip displacement sensor (GDS) for measuring the specimen movement just inside the grips and therefore excluding influences of additional parts in the load train. This is in accordance with existing knowledge about oscillations and stress waves in load train, influencing recorded force and displace- ment signals. [4,5] A general challenge of high-speed material testing is the impact occurring between the approach jig and actuator piston at test beginning. An approach device is usually used in high-speed systems in order to accelerate the piston to the desired test s.peed, before the specimen is loaded. As a result of the impact inside this device, oscillations, which are travelling as elastic stress waves, are transmitted to the load train. These waves are reflected in the load cell at the bottom of the test system and, as a consequence, influencing force and displacement measurements. In order to avoid or at least to reduce these oscillations, it is essential to install a mechanism for damping the force application. For this purpose, different materials or geometries at the contact surfaces can be used, as well as installing damping elements. However, the effect of damping should no longer have an influence on the measurement at a load of 25% of the yield strength [5].Materials and methods
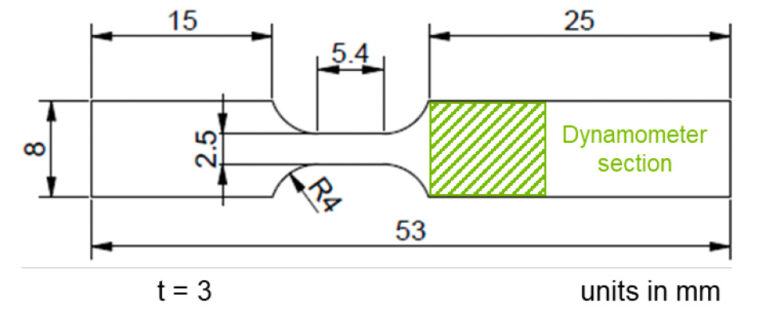
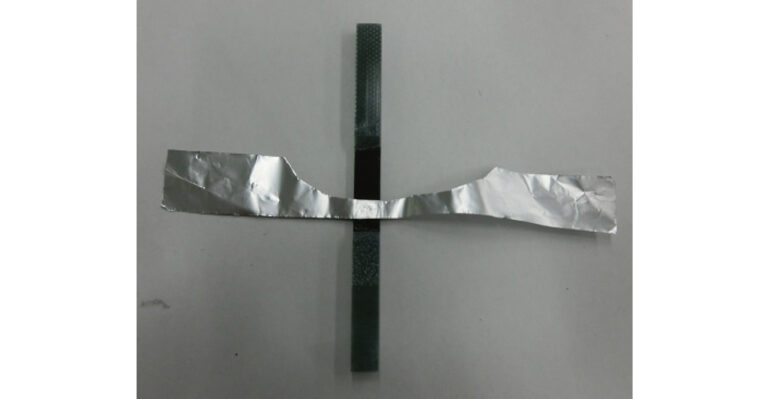
For investigations, a composite material made of glass fiber-reinforced epoxy (GFR-EP) is used, as a good representation of the material group mentioned above. The material is reinforced with bidirectional glass fibers in 0/90°orientations. Based on several studies, a positive strain rate dependency is expected [1-3]. The specimen geometry, Figure 2, is a further development of the specimen geometry and was specially adapted to the measurement with a high-speed video camera. In detail, the specimen provides an additional dynamometer section to enable force calculation with the help of digital image correlation (DIC).Results and discussion
In order to determine material properties in high- speed tests in general, different strain measurement techniques, such as strain gages, optical extensometers, laser systems or high- speed cameras, can be used [6]. By additional DIC-analysis of high-speed images the visuali- zation of strain distribution on the entire specimen becomes available. The same applies to force measurements, which can either be done by system-integrated load cells or inertia-free techniques.
a. Force measurement
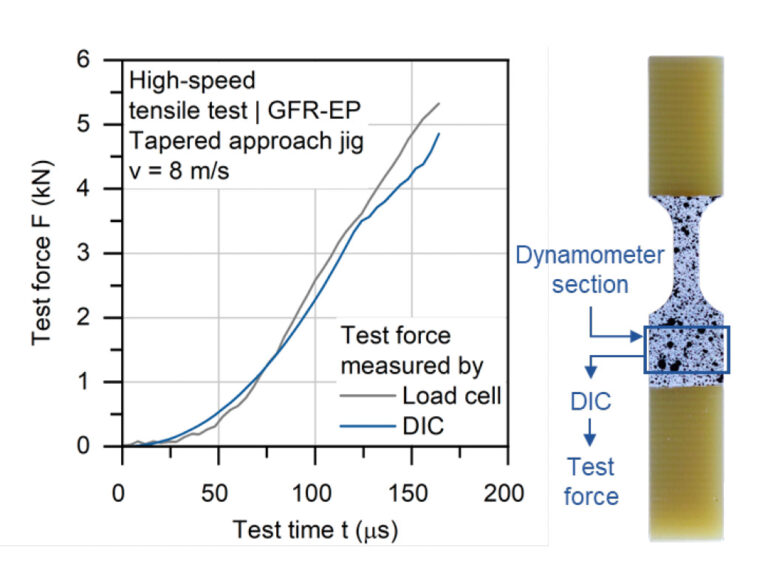
In order to assess the quality of the force measurement with a load cell, a comparison to forces calculated by DIC-analysis and HPV-X2 camera is done. A precise measurement is becoming available, when designing a dynamo- meter section for the specimen. Therefore, a slightly asymmetrical specimen is used for these investigations (Figure 5). This geometry allows a strain measurement in the gage section and a force measurement in the dynamometer section with DIC-analysis at the same time.
Normally, the dynamometer section is an area, where no plastic deformation occurs. Transferred for FRP’s a section is meant, where the deter- mination of Young’s modulus is allowed. Since the determination of Young’s modulus is allowed within the limits of 0.05 to 0.25% [8], a varying modulus versus the total strain is implemented, which is suitable for the visco-elastic material behavior of GFR-EP. Thus, the force, which is actually appearing on the specimen, can be determined by σ = Eꞏε (Hooke’s Law) F = EꞏεꞏA. However, the Young’s modulus has to be determined on a dynamic basis, because quasi- static material properties cannot be transferred to high-speed testing. Thus, the only possibility to determine a correct Young’s modulus is then a calculation within the short period of time in between of the impact at the approach jig and the elastic stress waves travelling until reaching the load cell at the bottom of the test system. Furthermore, it is important to average the measured strain in the dynamometer section over the same specimen width, which the cross section A is related to.
Figure 5 shows the comparison of test forces measured by load cell versus DIC, when using a tapered approach jig and a test speed of 8 m/s. The varying modulus mentioned above is related to the course of the mean strain (blue box) of 0 to 0.8% throughout the entire test.
It can be observed that the two curves do not differ greatly, which leads to assuming that using the load cell without any additional measurement technique is efficient as well. With higher test forces, there are deviations, caused by oscillating forces and reflected stress waves in the load train. At the beginning of the test, stress waves are induced into the load train, which leads to oscillations in the force signal, as seen between 25 and 75 μs. In the course of the test, these stress waves travel through the load train and load cell, where they are reflected. Depending on their phase shift and amplitude the waves can cancel each other out or amplify, which in turn leads to fluctuating deviations in the force signal, as seen between 75 and 125 μs. This shows that force measurement by DIC-analysis is often essential to obtain reliable results. So the propagation and interferences cannot be predicted and hence the use of a correction factor is not effective. However, the force signal is less influenced by the stress waves than expected, so it is possible to deter- mine correct material properties with the help of the integrated load cell. The first explanation for this behavior could be the use of the tapered approaching jig, as it does not contain a rubber ring. Therefore, no influences on the material properties are expected, especially at test beginning. However, as the test progresses, the influences of the stress waves become greater as they are being reflected at the load cell.
b. Displacement and strain measurement
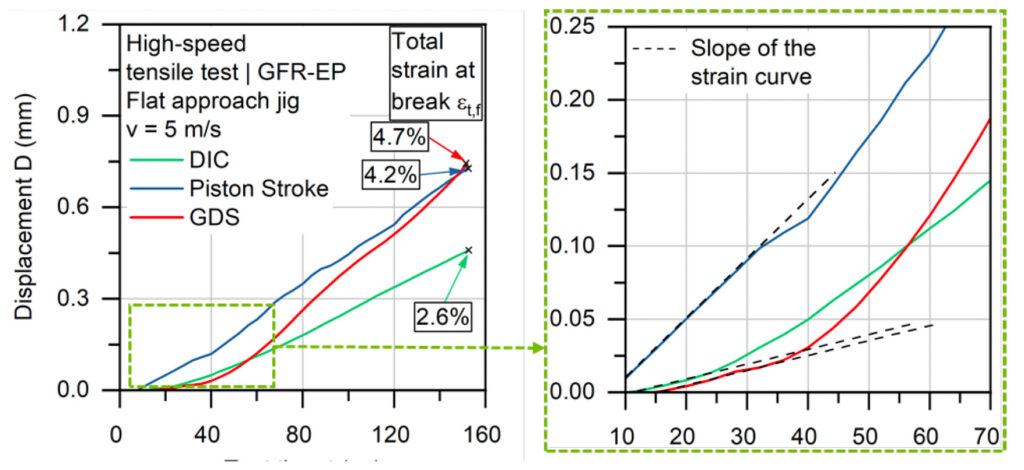
With the presented test setup, there are several techniques for strain measurement available: Piston stroke, GDS, and DIC. While the piston stroke is measuring the actual piston movement at the top of the load train, the GDS is just measuring the displacement between the grips. With DIC- analysis, on the other hand, displacements and strains can be recorded directly at the specimen.
Thus, only with DIC-analysis it is possible to determine true strains. Differences between these methods are expected, which could be due to the following influences:
- Components with different rigidities involved in the load train
- Elastic deformation of components in the load train
- Dampening effects by compression and force- absorbing properties of the rubber
- Measuring distance to the
As can be seen in Figure 6, the effects mentioned above could lead to significant deviations in the resulting strain curves. As expected, the piston stroke sensor is quite linear and differs greatly from the other curves, since most components and their deformation are included in this measure- ment. Furthermore, the impact and multiple collisions with the approach jig could be recorded by piston stroke. The deviations between GDS and DIC is small at low strains, but the increases as the test time progresses. But, as can be seen in the enlarged section, the slopes of the applied tangents within the given limits are equaling, thus the GDS is working well within small strains, where effects like specimen bending, clamping issues or clearance come into account.
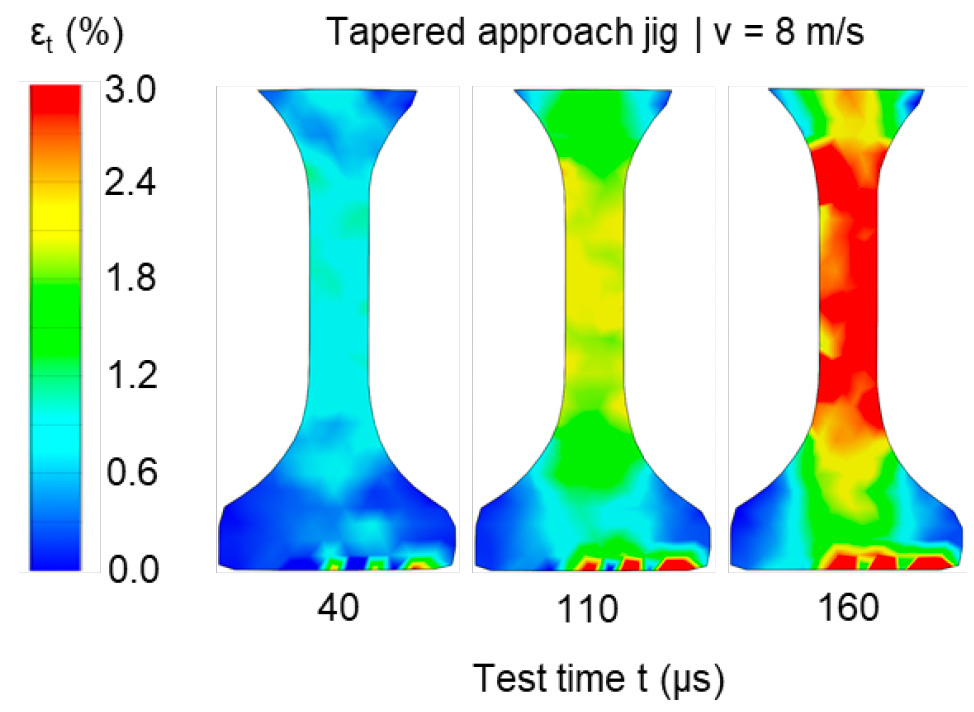
In order to visualize the strain distribution at the specimen, Figure 7 shows the total strain at different test times. It is obvious, that the specimen geometry is working well, since the strain distribution in the gage section is homogenous. However, an inhomogeneous strain distribution can be seen in the dynamometer section, which is due to the bidirectional fiber orientation. Since the specimen is made of continuous fibers, the load in 0°-layers in the middle of the specimen is being transferred from gauge to dynamometer section
whereas the outer fibers are subjected to a smaller force. From these findings it can be concluded that every local strain measurement, like strain gages, will not work properly for measuring force in the dynamometer section, since an inhomogeneous strain distribution can be found there.
Conclusions and outlook
Within this work at high-speed impact testing machine HITS-TX, a comparison of system integrated and additional techniques for measuring test forces and displacements was conducted. Especially these two parameters were defined as critical, since they can be influenced by oscillations, which are consequences of the impact inside the approach device. An innovative measurement with the help of HPV-X2 camera and DIC-analysis is presented, with which true test forces and total strains can be calculated. It could be shown that the force signal of the load cell shows only slight deviations from DIC- analysis, so that generating material properties is made possible especially with low strains, as in modulus determination. This procedure can be used for applications like creating material data for simulation purposes, especially if component testing in high-speed or crash load regime is cost- intensive. Regarding displacement and strain measure- ments, a clear dependency on the use of the appropriate measuring technique was pointed out. Where GDS can be used at low strains, it is essential to use DIC-analysis when determining total strains at the specimen failure. With the help of DIC, a local strain measurement and a strain distribution on the entire specimen could also be realized. Due to the triggering and synchronization by connecting HPV-X2 and HITS-TX, a sufficient number of images for strain evaluation is always ensured as well as a comfortable data analysis. References
[1] K. Naresh, K Shankar, B.S. Rao, R. Velmurugan: Effect of high strain rate on glass/carbon/hybrid fiber reinforced epoxy laminated composites. Composites Part B 100 (2016) 125-135.
doi: org/10.1016/j.compositesb.2016.06.007
[2] Y. Ou, D. Zhu, L. Huang, Y. Yao: Mechanical characterization of the tensile properties of glass fiber and its reinforced polymer (GFRP) composite under varying strain rates and temperatures. Polymers 8
(5) (2016) 1-16.
doi: 10.3390/polym8050196
[3] J. M. L. Reis, F. L. Chaves, H. S. da Costa Mattos: Tensile behaviour of glass fibre reinforced polyurethane at different strain rates. Materials and Design 49 (2013) 192-196.
doi: 10.1016/j.matdes.2013.01.065
[4] SAE J2749: High strain rate tensile testing of polymers.
[5] M. Keuerleber: Determination of Young’s modulus of plastics at high strain rates by the example of PP (in German), PhD work, Stuttgart (2006).
[6] DIN EN ISO 26203-2: Metallic materials – Tensile testing at high strain rates – Part 2: Servo- hydraulic and other test systems (in German).
[7] Myslicki, S.; Ortlieb, M.; Frieling, G.; Walther, F.: High-precision deformation and damage development assessment of composite materials by high-speed camera, high-frequency impulse and digital image correlation techniques. Materials Testing 57 (11-12) (2015) 933-941.
doi: org/10.3139/120.110813
[8] DIN EN ISO 527-1: Plastics – Determination of tensile properties – Part 1: General principles (in German).
