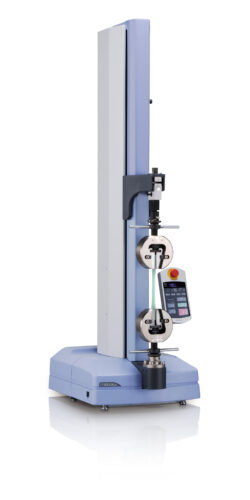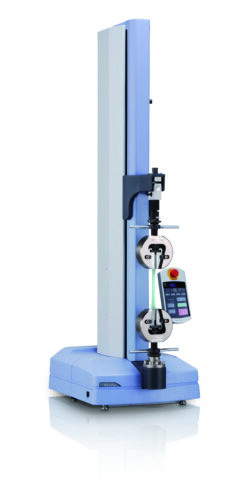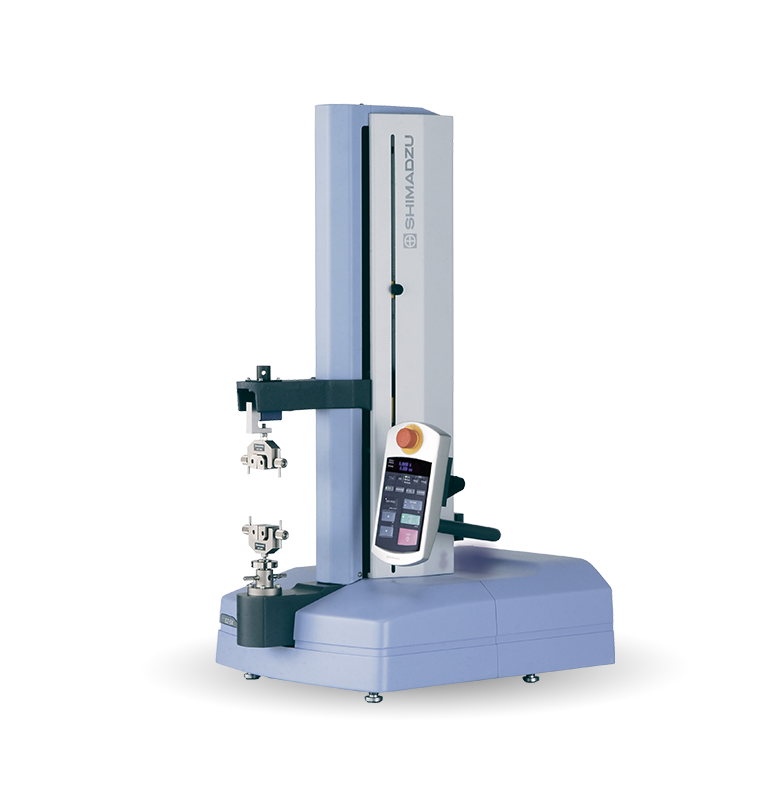
EZ-SX/LX
Small Table-Top Universal Testing Machine
| Test force | 1 N – 500 N |
| Test type | Tensile, bending & compression tests |
| Drive | Electrical mechanical |
| Type | Table-top appliances |
| Industries | Universal |
Table-Top Universal Testing Instruments
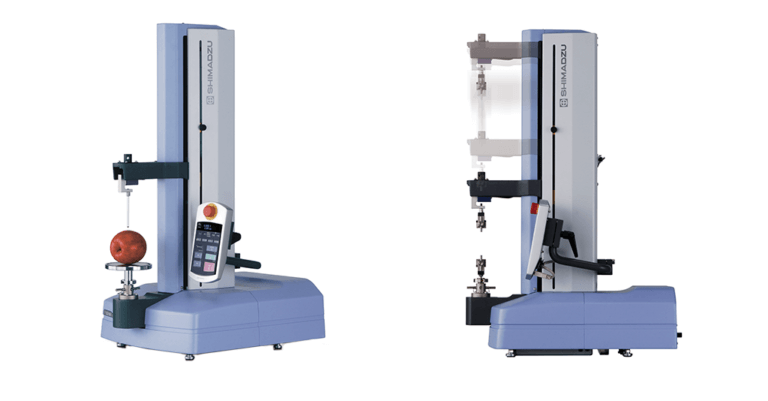
Lightweight and Compact
Convenient to Use
The height of the device has been lowered significantly. This makes it easier to exchange jigs and samples, and to perform a wide variety of operations.
Adjustable Control Panel
An adjustable manual controller allows the user to set the crosshead positioning and start or stop testing. The position and angle of the control panel can be adjusted to match the user’s posture.

High-Precision Testing System
High-speed cameras are used to observe and measure high-speed phenomena. These include the behavior of plasma in etching systems, sputtering systems and other plasma equipment, and machining processes in laser machining systems, electrical discharge machines, and cutting machines. In addition, they are used for failure mode analysis, including observations of the moment of destruction of the insulating film on the semiconductor devices.
Note: Shimadzu recommends inspection at an installation site that meets the requirements speci ed in these standards.
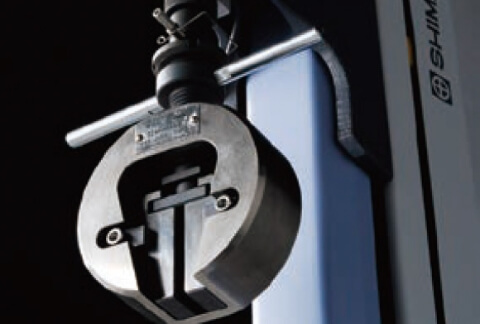
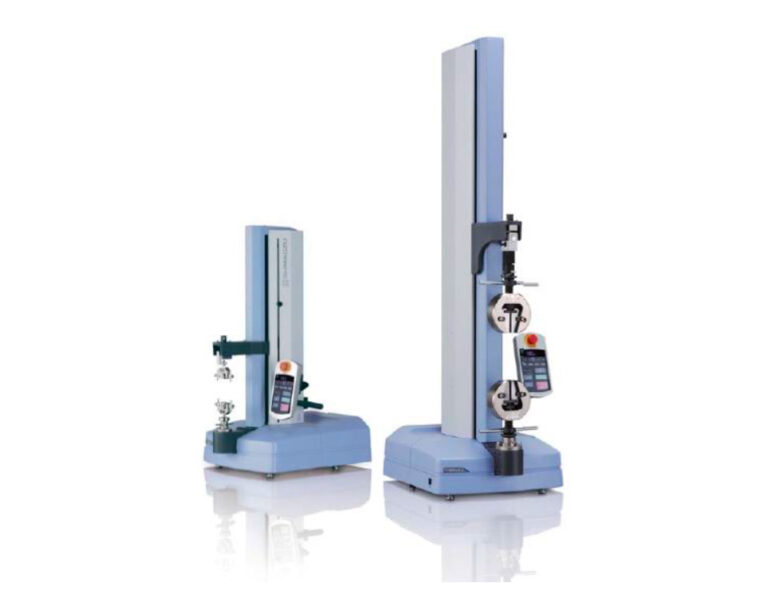
A Range of Models to Meet a Variety of Needs
Research is advancing into a drug delivery system in which microcapsules containing pharmaceutical agents and microbubbles are introduced in proximity to cancer cells. Exposure to ultrasonic waves is used to rupture the capsules, and the pharmaceutical agents are then guided into the cancer cells. The images illustrate the expansion, contraction, and destruction of microbubbles in proximity to cancer cells, and the mechanical impact of this process on the cells.
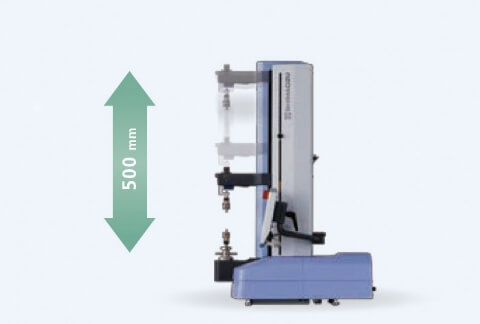
EZ-SX Short Model
This is ideal for testing foodstuffs, pharmaceuticals and their packaging, and electrical or electronic parts. With a wide range of testing speeds, it can accommodate all sorts of evaluation testing applications.
Max. Capacity: 500 N
Max. Stroke: 500 mm
Test Speed Range: 0.001 to 1000 mm/min
Max. Return Speed: 1500 mm/min
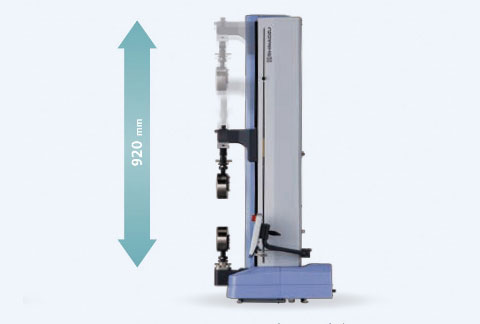
EZ-LX Long-Stroke Model
With a 5 kN maximum capacity, this is perfect for the tensile testing and bend testing of plastics. The 920 mm stroke capacity also makes it perfect for testing rubber, lm, and other materials with large elongation.
Max. Capacity: 5 kN
Max. Stroke: 920 mm
Test Speed Range: 0.001 to 1000 mm/min
Max. Return Speed: 1500 mm/min
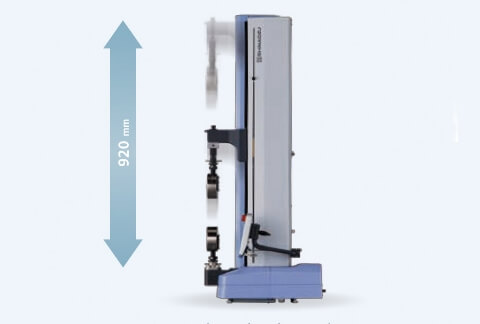
EZ-LX HS Long-Stroke and High-Speed Model
The long stroke improves productivity. The 3000 mm/min return speed signi cantly reduces the waittime between tests, even for tests with large displacements.
Max. Capacity: 2 kN
Max. Stroke: 920 mm
Test Speed Range: 0.001 to 2000 mm/min
Max. Return Speed: 3000 mm/min
Suitable for Product Tests in Diverse Fields
Physical evaluation testing is now required in more elds than ever before. EZ Test offers an ample selection of specialized jigs and features to support a wide variety of customer requirements
- Food products
- Pharmaceuticals, medical devices, and household items
- Electrical and electronic parts
- Plastics and rubbers
Evaluating Food Textures
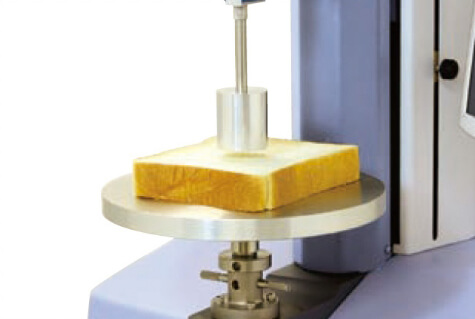
Compression Test on Bread
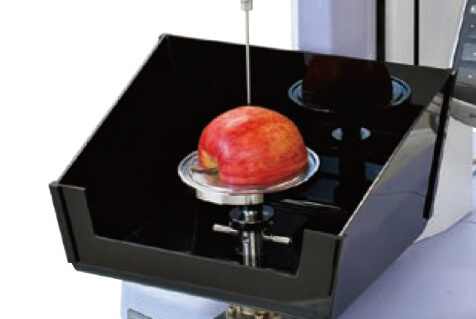
Surface Hardness Test on Apple
Piercing test jigs are used for piercing and penetration tests. They make it possible to evaluate the surface hardness (yield point) of skins, coatings etc. on samples such as vegetables, fruits, and jelly beans.
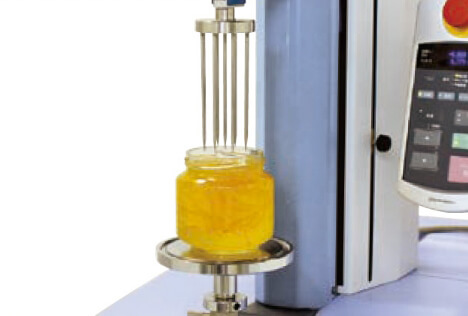
Piercing Test on Jam
Multi-piercing jigs make it possible to evaluate the hardness or cohesiveness of samples containing food pieces (a large number of small pieces with varying shape) or air bubbles dispersed throughout the sample, such as jam with pieces of fruit, ice cream with cookie pieces, or vegetables. The jig enables evaluation of average properties over multiple points, to minimize variation due to point of entry.
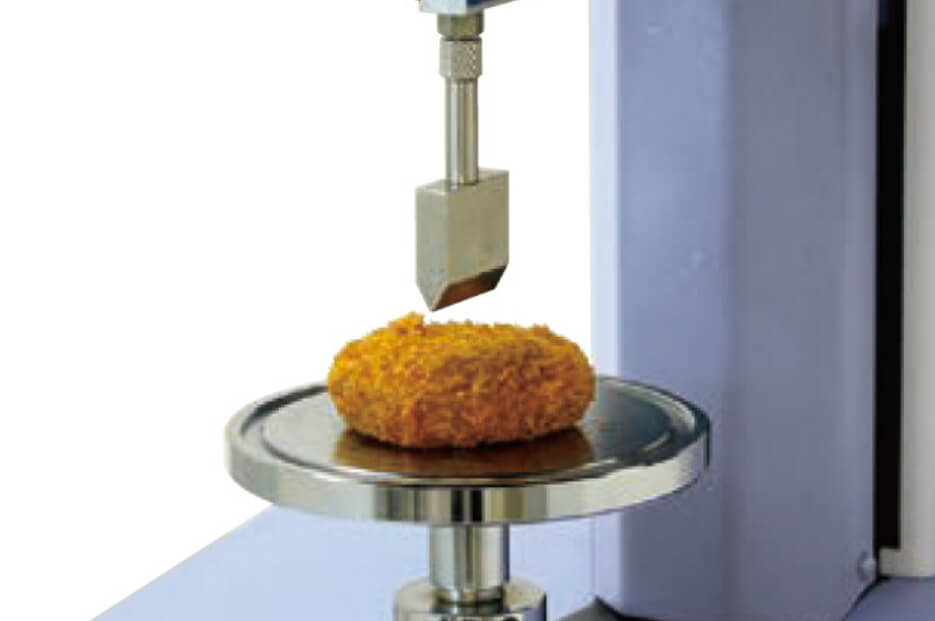
Shear Test on Potato Croquette
This jig is designed to simulate the shape of various types of teeth. It is used to test the compression, shear, crush, and other characteristics of food specimens. It enables comparative testing of crispiness, brittleness, chewiness, and other characteristics.
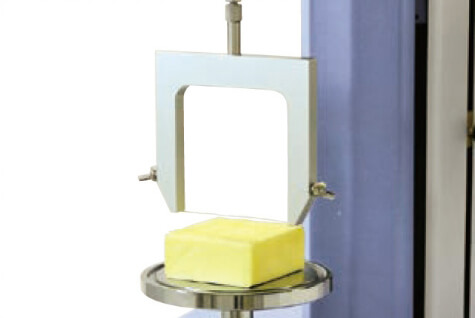
Shear Test on Butter
This wire cutter jig uses a 0.3 mm diameter stainless steel wire for shear testing of samples such as butter, margarine, cheese, and noodles. It makes it possible to evaluate the surface and internal rmness of samples.
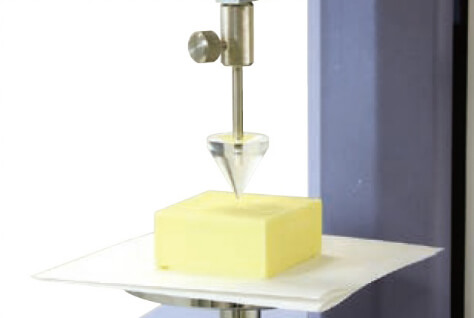
Hardness Test on Butter
Conical press jigs are used for compression or piercing testing for samples that exhibit thermal plasticity, such as butter, margarine, and bar soap. They are used to evaluate characteristics such as the hardness and spreadability of samples.
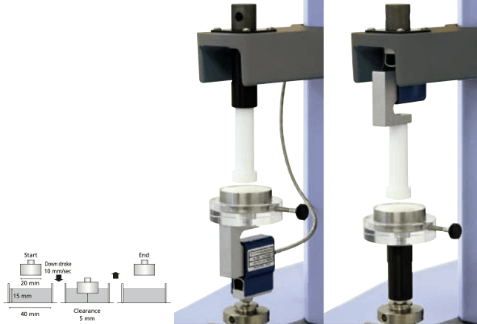
Evaluation Tests of Nursing Care Foods
This jig set is used to test foods intended for people with dif culty swallowing, based on the noti cation issued by the Japanese Consumer Affairs Agency, or to test “universal design foods” advocated by the Japan Care Food Conference. It is designed to accurately measure even small test force pro les obtained from soft foods. A 40 mm diameter container is lled to a depth of 15 mm with the sample, which is then compression tested with a 20 mm diameter plunger.

Tensile and Shear Tests on Noodles
This jig is used to tensile-test various types of noodles or pasta, such as udon (thick wheat noodles), soba (buckwheat noodles), or spaghetti. Two jig types can be selected, where one secures the noodles by pinching them between two surfaces and the other secures the noodles by wrapping them and using the tightening force of the noodle itself. It allows evaluation of characteristics such as the tensile strength and elongation of noodles.
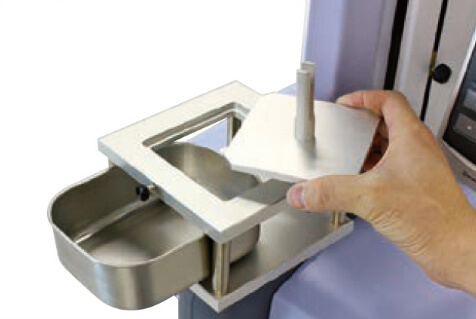
Jig Platform
The upper plate portion can be replaced with various jig attachments such as a tray for catching extruded or spilled samples or a waterproof tray. Without any attachments, the platform can be used as a table.

Shear test on Asparagus
The Volodkevich bite jig simulates a human incisor tooth biting through a sample. This jig is used to measure the softness or hardness of meat, the shear force required to bite through asparagus, celery or other brous fruits or vegetables, or for piercing testing.
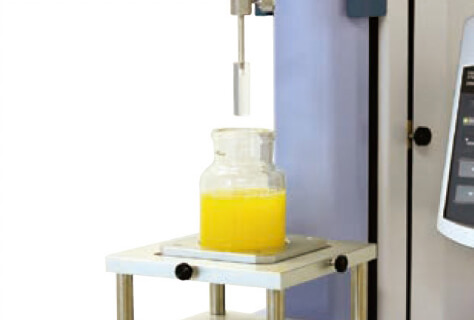
Viscoelasticity Test on Gelatin
This apparatus makes it possible to perform gelatin tests (JIS K 6503) or other viscosity tests of gelatinous samples. A 85 mm tall glass container with a 60 mm internal diameter and a 0.5 inch (12.7 mm) compression plunger (cylindrical jig) are used.
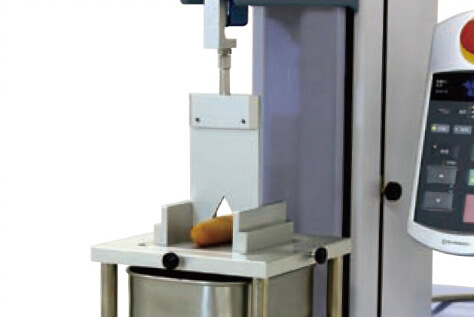
Shear Test on Sausage
This jig enables shear tests that involve cutting with a blade. In addition to V-cuts for Werner Platzer tests, it allows the user to substitute blades with other edge pro les. It is used to evaluate the shearing of foods such as meats, sausages, cheese, vegetables, and snack bars.
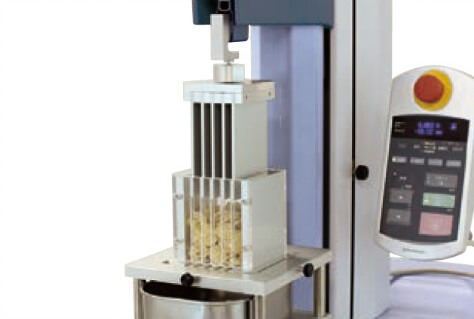
Compression Shear Test on Cereal
The Kramer shear cell is a specialized jig that uses multiple blades to perform compression, shear, and extrusion tests. It enables repeatable testing of cereals, beans, sauces containing food pieces, and other samples.
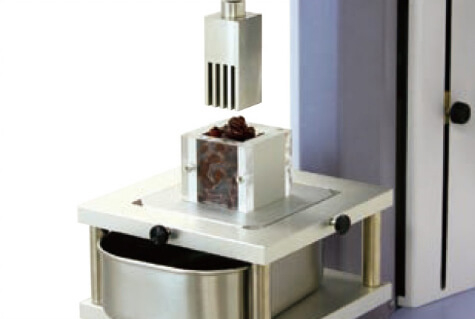
Compression Shear Test on Beans
This specialized mini-Kramer shear cell allows testing of smaller sample quantities. Just as with the standard size jig, this is used to evaluate samples by shearing, compressing, and extruding the samples.
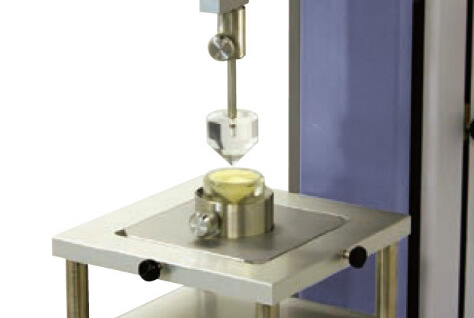
Spreadability Test on Margarine
This jig set is used to evaluate how easy it is to spread samples that are normally spread into a thin layer, such as margarine or car wax. The jig set measures the test force required to spread a sample between the upper and lower jigs.
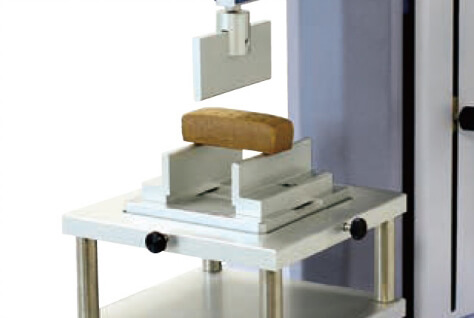
Three-Point Bending Test on Cookies
This setup makes it possible to evaluate the breaking strength or brittleness of samples by performing a bending test. It is ideal for testing the three-point bending strength of samples such as biscuits or chocolate bars. Different types of upper punches or supports can be selected based on the sample.
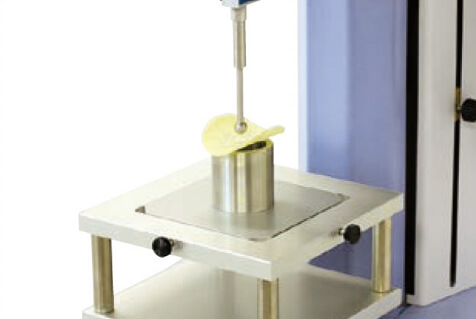
Break Strength Test on Potato Chips
This jig is used for penetration testing of items such as snack foods and potato chips. The test force required to break samples can be measured and used as an index for evaluating brittleness or crispiness.
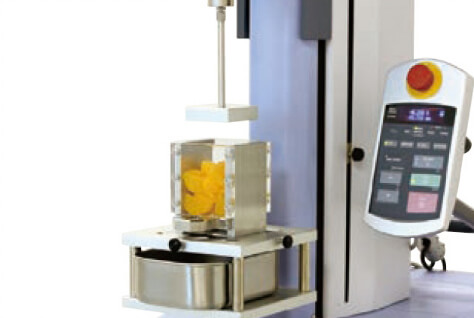
Crush Test on Fruit
Ottawa cells are specialized jigs that compress samples and measure the compression or extrusion force required to extrude the sample through a slit in the bottom. They are used to evaluate samples such as vegetables, fruits, beans, and cereals.
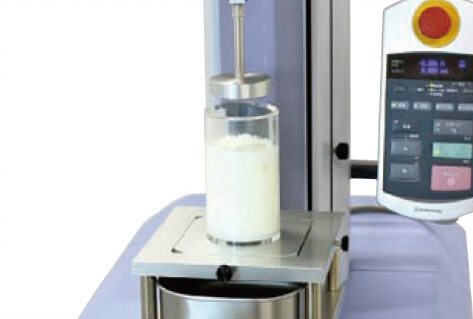
Extrusion Test on Liquid
This jig makes it possible to measure the test force required to extrude samples through a hole. The extrusion hole size can be changed based on the concentration and viscosity of the sample. It is used to evaluate liquids such as sauces, pastes, and gels.
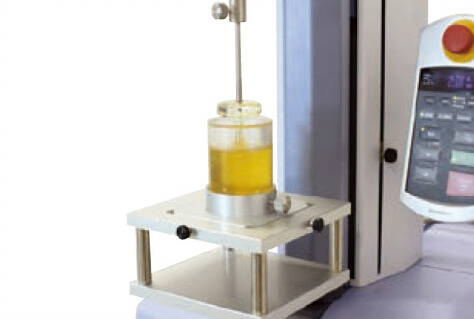
Viscoelasticity Test on Liquid
This setup is used to evaluate the viscosity of viscous samples, such as yoghurt, cream, sauces, ground fruit or vegetables, or paint. Different compression plates are used based on the viscosity, food piece content or size of samples.
Evaluating Pharmaceuticals, Medical Devices, and Household Goods
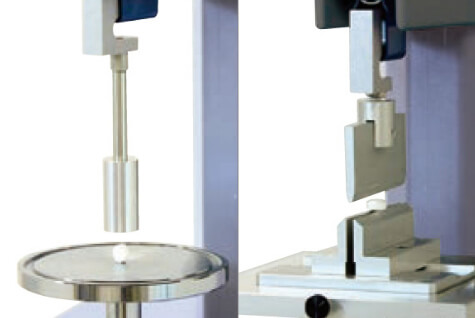
Compression and Splitting Tests on Pills
By compression testing, pills, hard candies, and similar items can be evaluated in terms of hardness, powder molding, and surface coating characteristics. The type of compression plate and spherical press jig can be selected based on the tablet size.
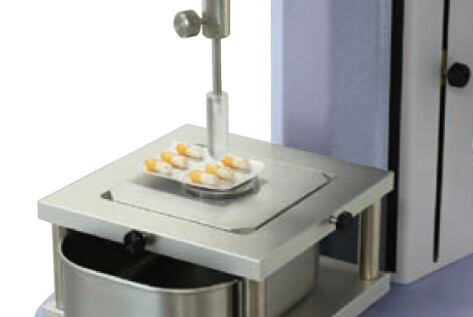
Press-Dispense Test on Tablets
This setup used to evaluate the force necessary to press tablets or capsules out of press-through packaging (PTP). Various PTP shapes can be tried out by changing the adapter.

Injectability Test on Syringe Needle
An injectability test measures the test force required to pierce a vial cap, lm, or other material with a syringe needle. The insertion of the needle into the syringe is repeatable because the length to be inserted is speci ed in regulations
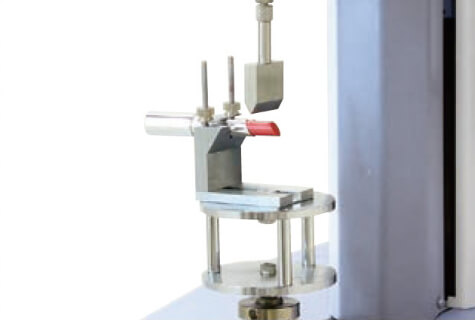
Hardness Test on Lipstick
This jig is used to evaluate the hardness of lipstick. The lipstick is secured in a horizontal position and pressure is applied in a vertical direction for evaluation.
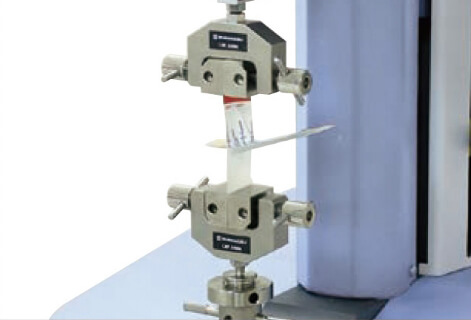
Testing Adhesive Bandages
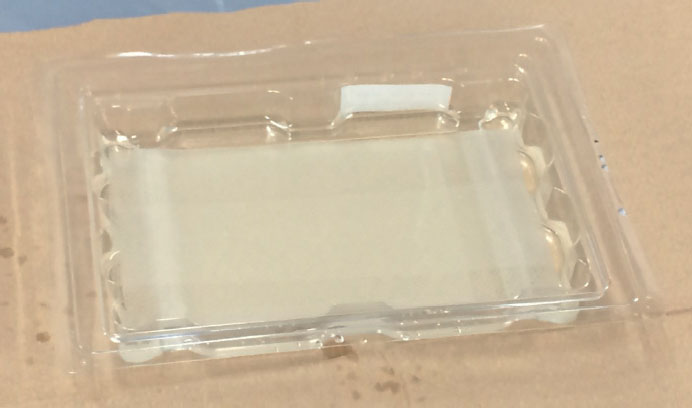
The physical properties of adhesive bandages are evaluated by testing the force required to peel open the bandage packaging, its adhesiveness, tensile strength etc.

Extrusion Test on Syringe
This jig makes it possible to measure the test force required to extrude samples from a syringe. Syringes of up to 30 mm diameter can be accommodated by changing the adapter.
Evaluating Plastics and Rubbers
Tensile Test on Rubber Dumbbells
In this example, a rubber dumbbell was tensile-tested using pneumatic at grips. These grips are able to use air pressure to grip specimens with a constant force, which makes it possible to securely grip rubber and other specimens that decrease in thickness as tension is applied. Using an DSES-1000 extensometer allows elongation to be accurately measured all the way up to the breaking point. DSES-1000 is compliant with various rubber tensile testing standards.
- JIS K6251:2010
- JIS K6272:2003
- ISO 37:201
- ISO5893:2002
- ASTMD412-06a
- GB/T528-2009

Tensile Test on Film
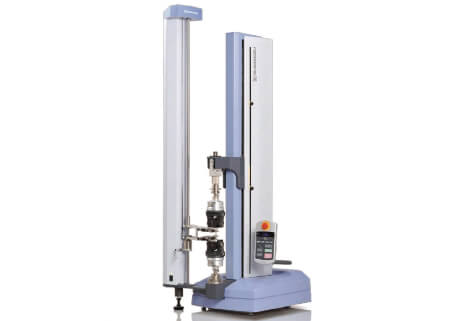
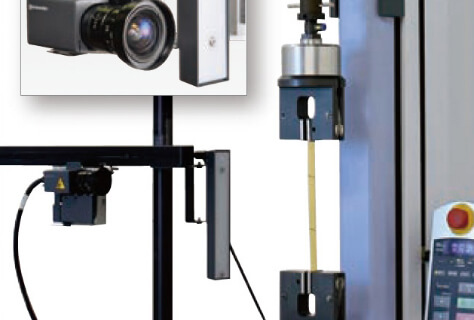
In this example, lm was tensile-tested using grips intended for foil. These grips have a special grip face that reduces the breakage of lm and copper foil samples at the chuck during testing. When used in combination with a TRViewX non-contact digital video extensometer, elongation and lateral displacement can be accurately measured, which means the modulus of elasticity can also be calculated.
Tensile Test on Plastic
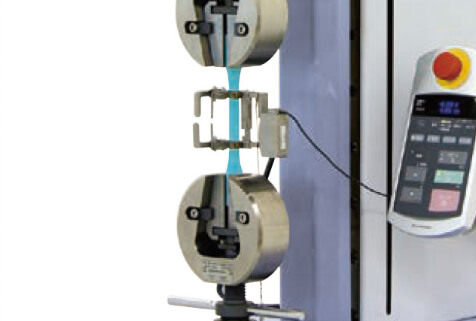
In this example, a tensile test was performed on a plastic sample using 5 kN non-shift wedge-type grips. The grip faces move horizontally to tighten their grip on the sample without moving in the vertical direction. This makes it easy to set the distance between grips and minimize any vertical test forces acting on the specimen during the initial tightening. When a tensile test force is applied, it causes the wedges to hold the sample securely. Furthermore, the user can comply with ISO standards by using an SSG-H strain-guage-type one-touch extensometer.
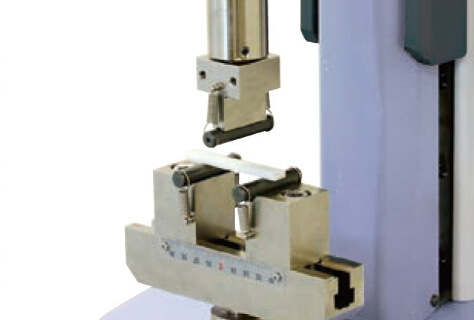
Bending Test on Plastic
In this example, a 3-point bending test jig is used to test the bending of a plastic sample. This 3-point bending test jig for plastics was designed to meet JIS, ISO, and ASTM standards and allows testing for any thickness within the scope of the standards by changing the support set. It also includes a jig for setting the distance between supports and checking whether the punch and supports are parallel, which makes it easy to adjust the test jig.
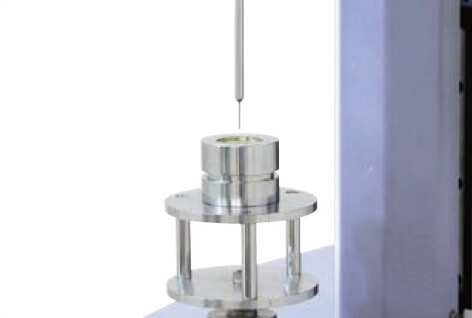
Piercing Test on Film
This jig makes it possible to measure the piercing strength needed to puncture various lm materials, such as those used in retort (boil-in-bag) pouches. Test samples are cut into circles about 20 mm in diameter for testing.
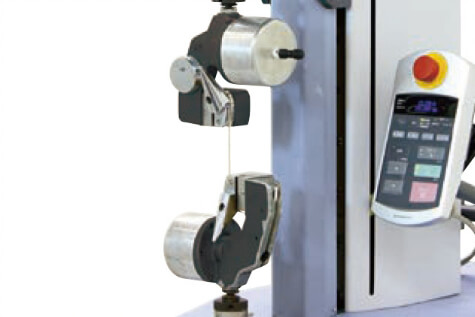
Tensile Test on Fibers
This jig includes capstans to grip thread, cords, and other narrow brous samples so that an initial tension force can be applied and breakage can be prevented at the chuck. Samples are gripped pneumatically
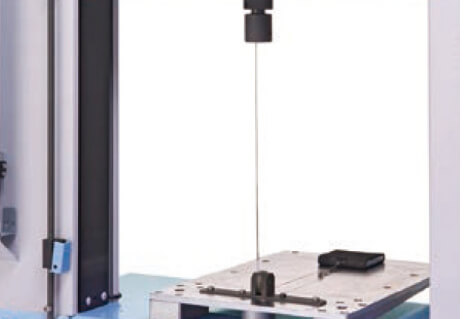
Friction Modulus Measurement
This test device measures the friction between plastic lms or between plastics and other materials. Both static and dynamic frictional forces can be measured seamlessly.
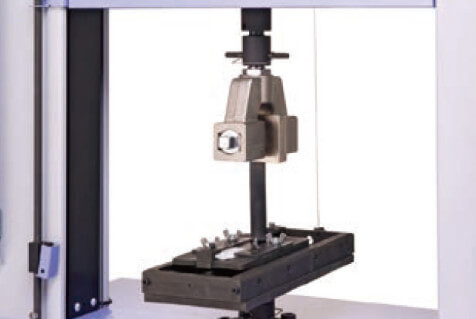
Peeling Test on Adhesive Tape
The sample table slides in sync with the upper grip movement to maintain a 90° peeling angle. The peeling test jig is compliant with JIS Z0237 and JIS Z1528.
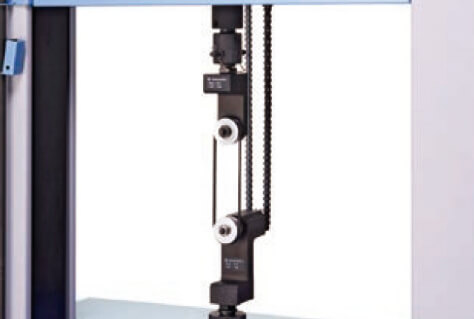
Tensile Test on O-ring
The O-ring is hooked onto rollers, which rotate during tensile testing. Tests conforming to JIS K6251, JIS K7312, ISO 37, and ASTM D412 standards can be performed.
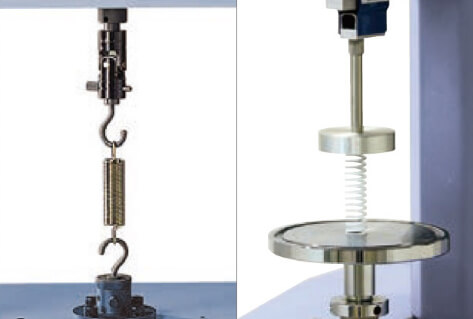
Compression Test on Springs
The compression strength of springs can be measured by compressing the spring between upper and lower compression plates. The lower compression plate is designed so that ne adjustments can be made to the parallelism of the plates.
Evaluating Electrical and Electronic Parts
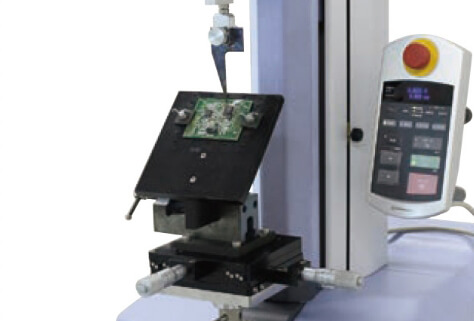
45° Peel Test on Surface Mounted Devices
This test jig set is used to measure the peel strength of electronic parts, particularly the pins on IC chips.
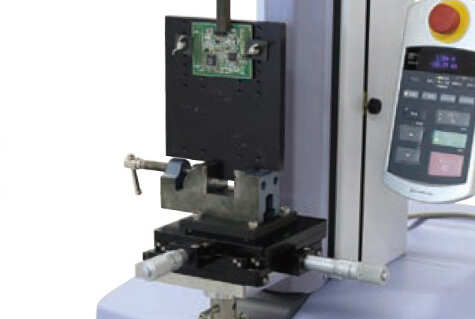
Shear Test on Electronic Components
This test jig set is used to press vertically on components to measure their shear strength.
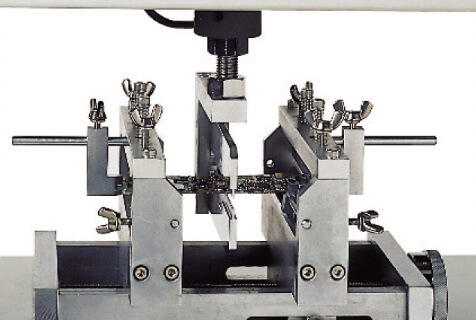
Cyclic Bending Test on Printed Circuit Board
This test jig is for cyclic bending tests of printed circuit boards. It allows observation of uctuations in resistance in response to cyclic loads, as well as other properties. It enables repeatable tests of the thermal expansion and contraction of solder.
Supported by a Refined Operation System
TRAPEZIUM X Material Testing Operation Software
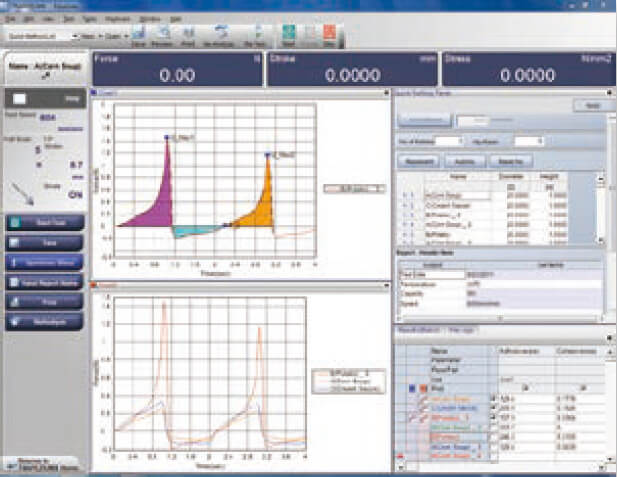
By registering frequently-used parameters in a Quick Parameter List, tests can be started with a single step.

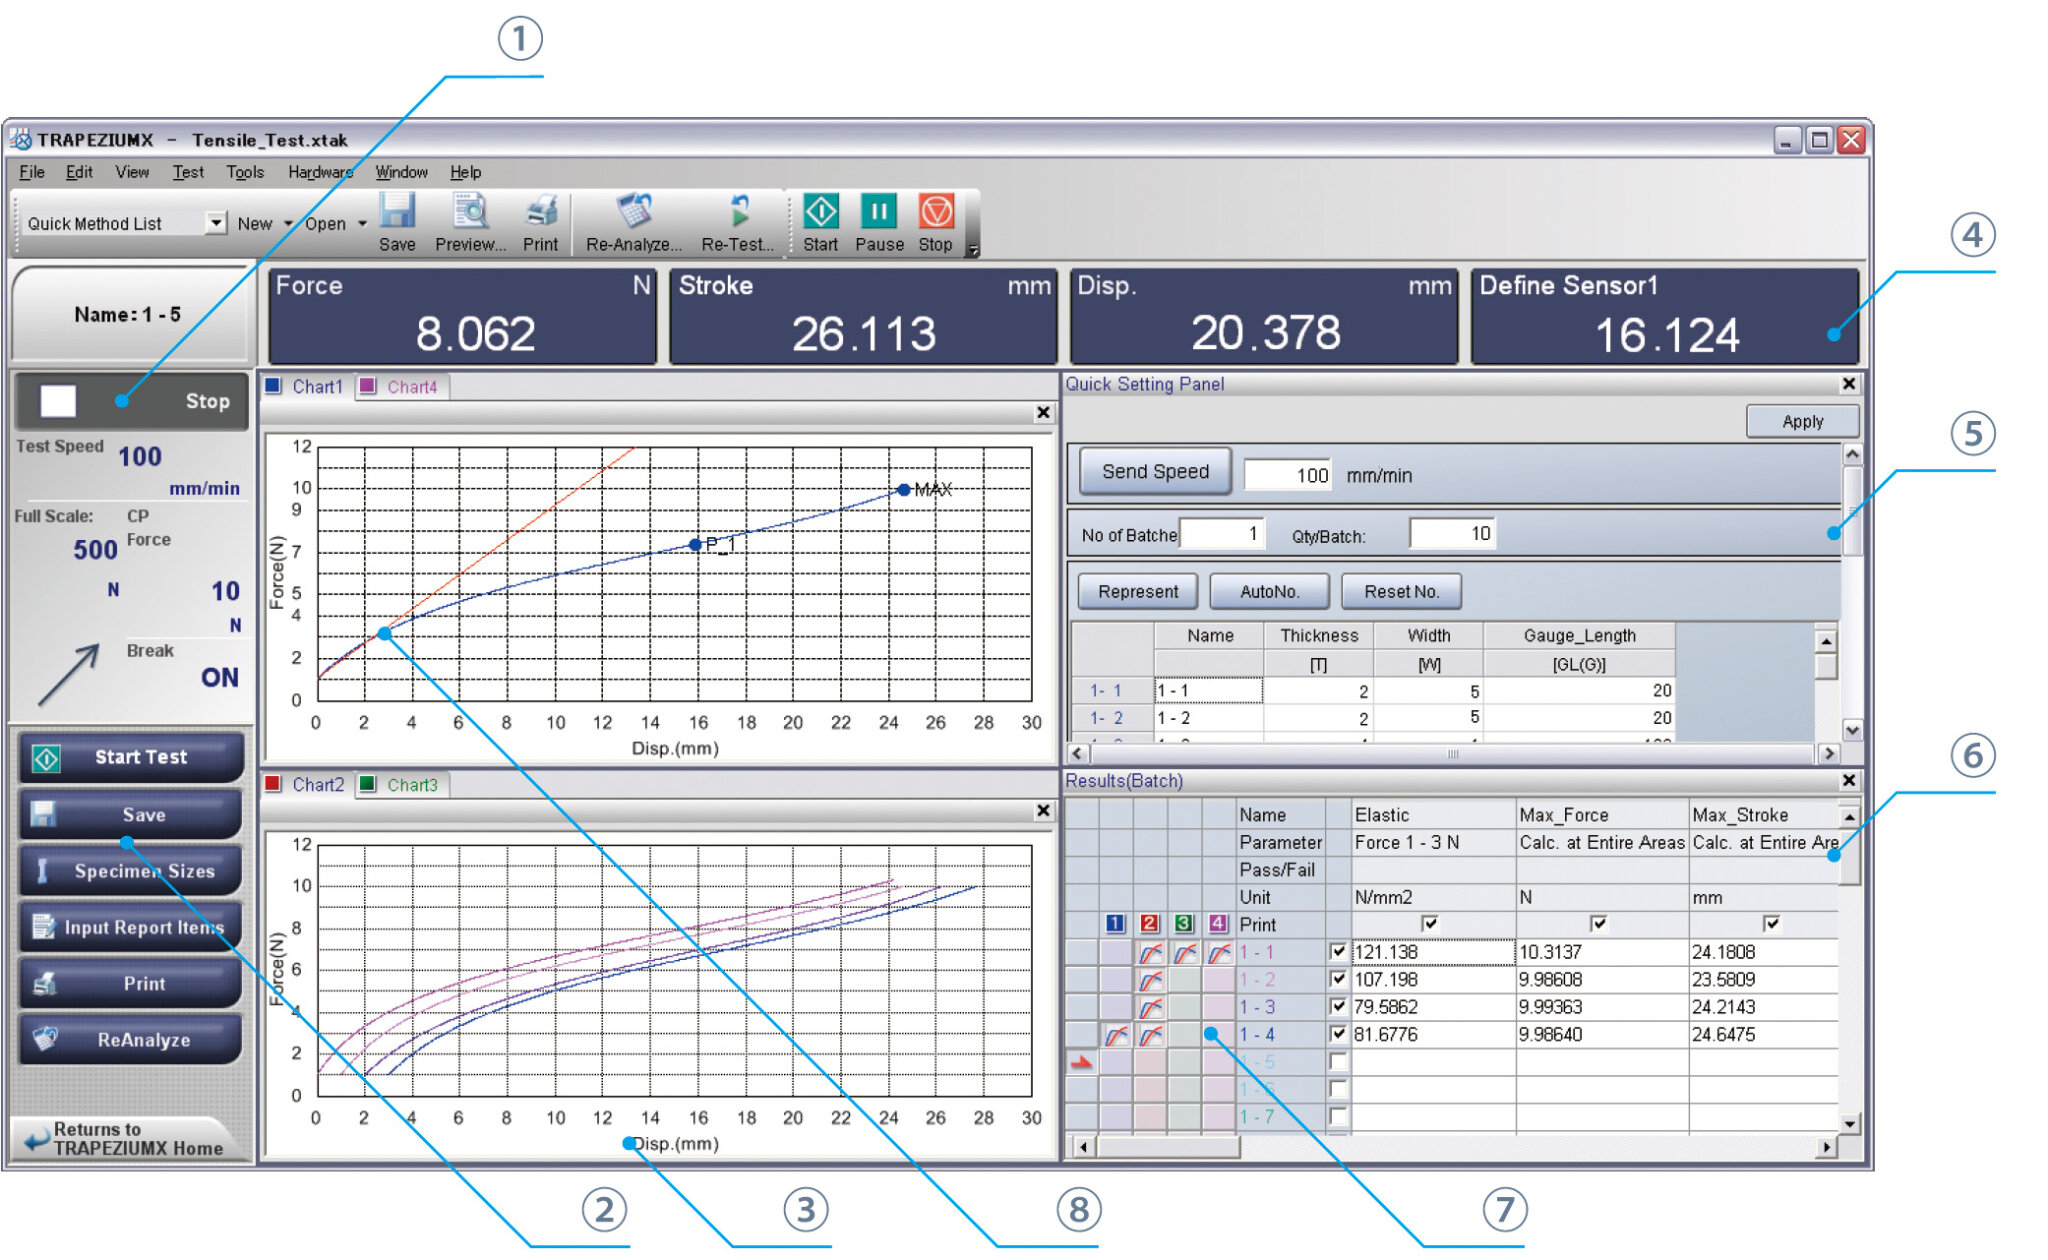
1 Test Method & Status Panel
Confirm testing conditions and the test status from the main window.
5 Quick Panel
The speed, dimensions and report information can be entered directly from the testing screen.
2 Advanced Navigation System with a Learning Function
Confirm testing conditions and the test status from the main window.
6 Results Panel
This panel allows the user to change a variety of settings for repeat tests and batch testing. For example, samples can be inserted in any order, or added only to a specific batch.
3 Multiple Graph Function
Up to four graphs can be displayed at once. The settings for both axes can be edited. A maximum of 50 graphs can be overlaid, and the user can select points with the mouse. This allows the user to examine each test in more detail.
7 Checkboxes to Select Curves
The user can select which data appears in each graph window, making it easy to compare SS-curves or graphs with a user-specified axis.
4 Real-time Data Display Panel
Displays the test force, stroke (strain), extensometer or strain gauge value and other input values, all in one window. Optional calculated values can be displayed at the same time, so that data can be checked more smoothly.
8 Various Data Processing Functions
Many data processing functions are available e.g. for calculating modulus of elasticity. Settings can be applied by simply pressing the buttons above the figure.
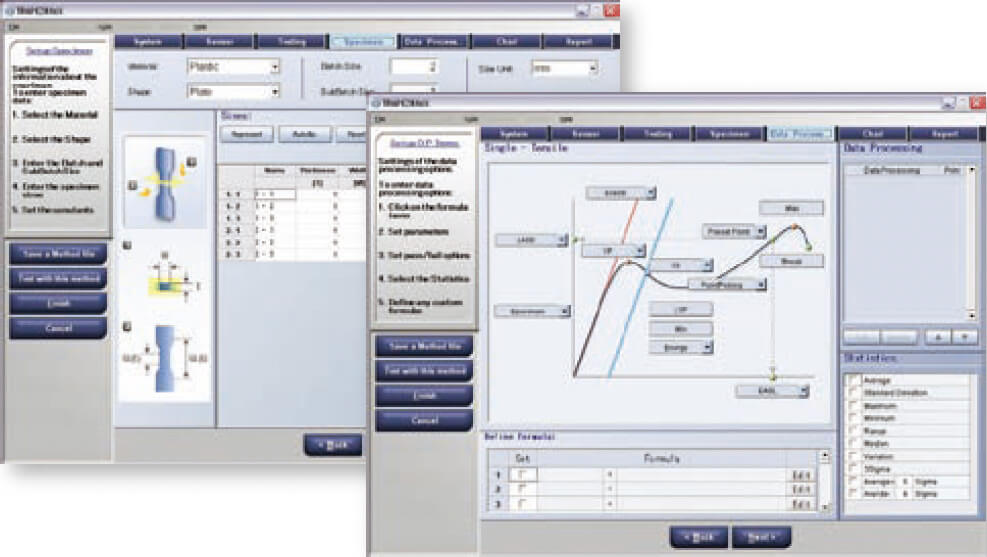
Single
This software is specialized for standard testing of plastics, rubber, fibers, textiles, film, paper, electronic components, and other items that are tested with one-dimensional movement.
Single
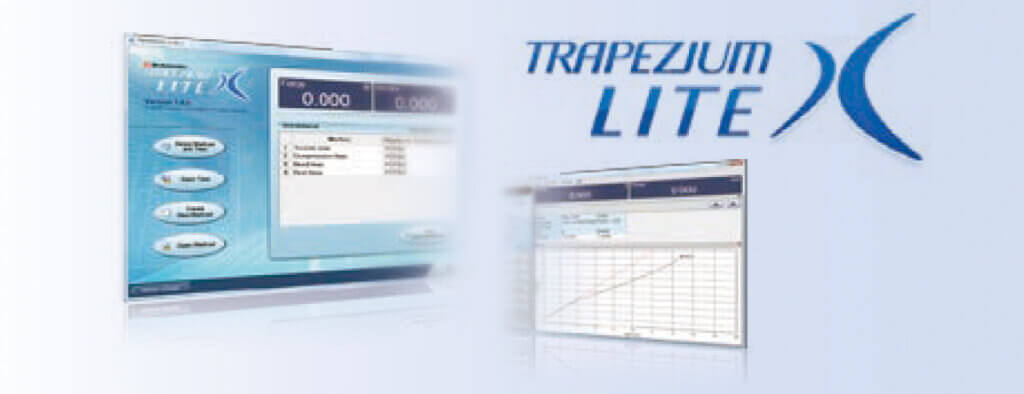
Tensile tests, compression tests, 3- and 4-point bending tests, peel tests, and more TRAPEZIUM LITE X is software based on the Single module of TRAPEZIUM X software. Linking the testing machine to a computer significantly improves the efficiency of routine testing. It is particularly useful for quality control testing, which nvolves performing tests frequently using a given set of test parameters.
* The Texture, Cycle and Control software modules cannot be added to Trapezium Lite X.
Texture
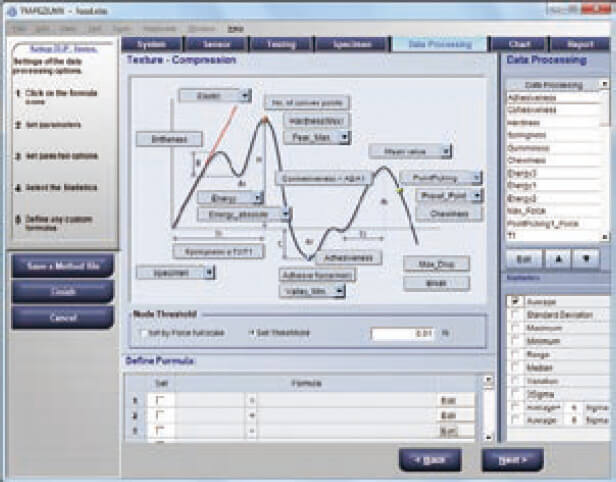
This software is ideal for checking food textures, or evaluating the quality or physical properties of pharmaceuticals, cosmetics etc. It allows the user to define control patterns in order to create data processing rules specialized for foods, for example for finding hardness, brittleness, and energy.
Texture
Compression tests (piercing, penetration, and break analysis tests), tensile tests, texture tests (two-bite method), indentation tests, gel strength tests, shear/cutting tests, adhesiveness tests, hardness tests, and more
Cycle
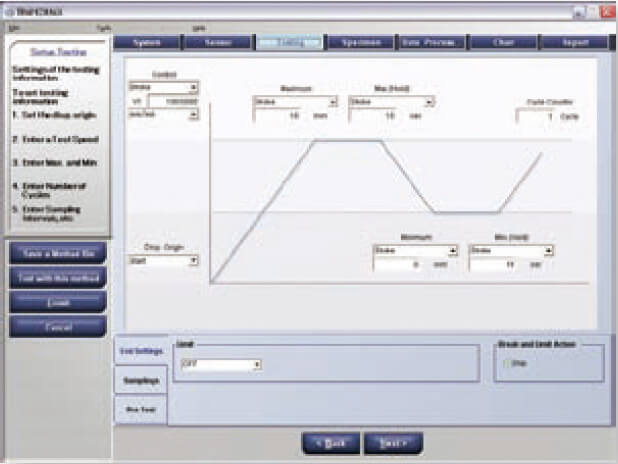
This software enables endurance tests and other tests that involve repetitive vertical movement. It is especially well suited to testing individual parts of electronic devices or testing the endurance of printed circuit boards and connectors.

Control
This software allows the user to freely specify the order of a testing machine’s movements. It makes it possible to configure complicated combinations of tensile, compression, and holding steps.
Options
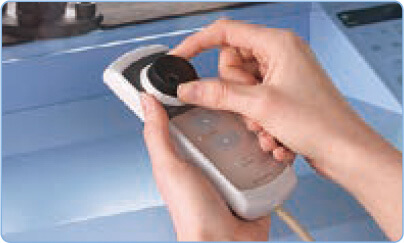
Jog Controller
346-55922-01
The jog dial is provided to allow nger-tip operation of the crosshead position.
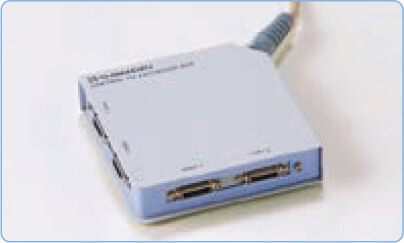
Control I/O Expansion Box
346-55920-01
Increases the number of control I/O ports to four. Multiple optional accessories can be simultaneously connected to the control I/O ports.

Sensor I/O Expansion Box
346-55920-02
Increases the number of tester sensor I/O ports to two. Multiple optional accessories can be simultaneously connected to the sensor I/O ports. BNC cables can be connected to the analog I/O ports.
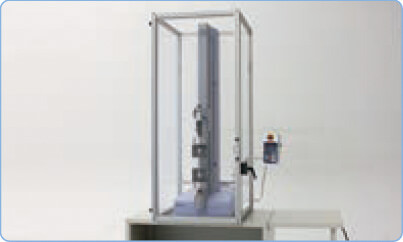
Safety Cover
EZ-SX: 346-57107-01
EZ-LX: 346-57107-02
This is used to prevent injury when sample fragments are scattered due to fracture.
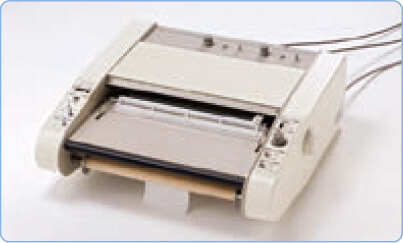
Analog Recorder
X-T type: 346-59210-01 Plots test force – time curves.
X-YT type: 346-51736-01 Plots test force – time curves and test force – stroke curves
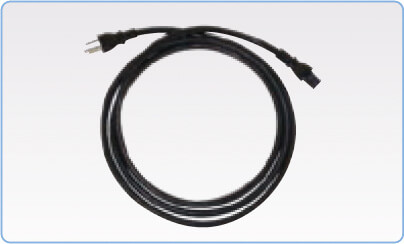
Power Cable
For EU (VDE standard) 348-34063-03 For China (GB standard) 348-34063-02 For Japan and North America (UL, CSA, PSE standards) 348-34063-01 is provided as standard.
Additional Load Cell Kits
Select a load cell kit if load cells are to be added to the tester unit kit. The additional load cell kit comprises a cell set (load cell and calibration cable), cell bolt (if required), and upper joint jig (if required).

Thermostatic Chamber
Allows testing within an ambient temperature range of -70°C to 250°C. Thermostatic chambers are available only for EZ-L type testers. The chambers are special-order items. For details, please make a separate inquiry.
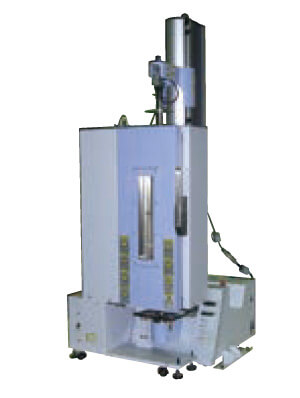
Other Options

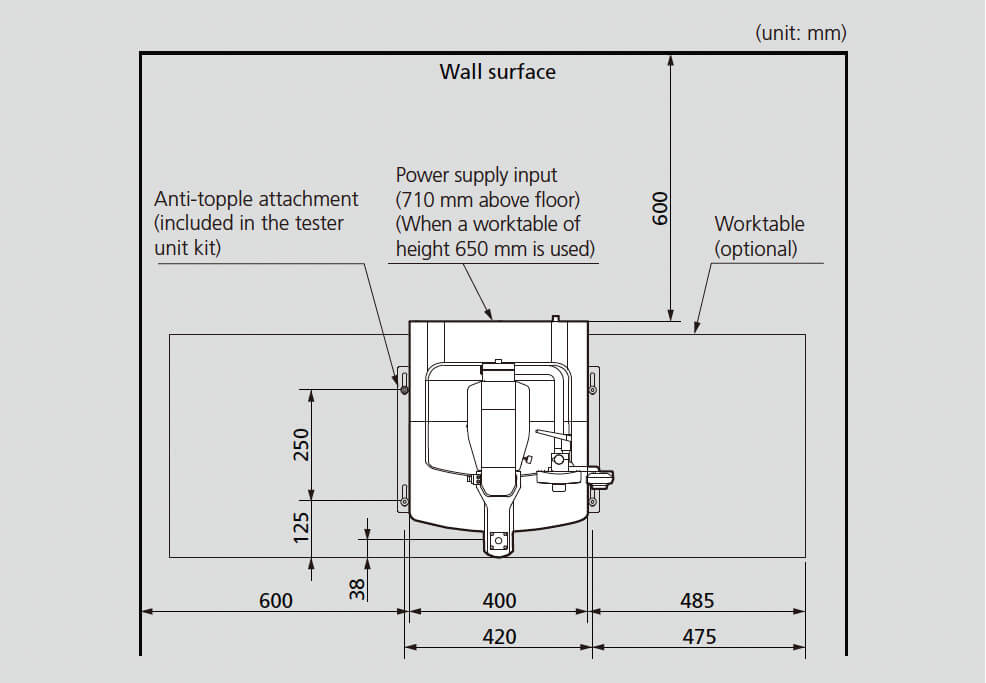
Installation Space
Note: A similar installation space is required for both EZ-SX and EZ-LX.
